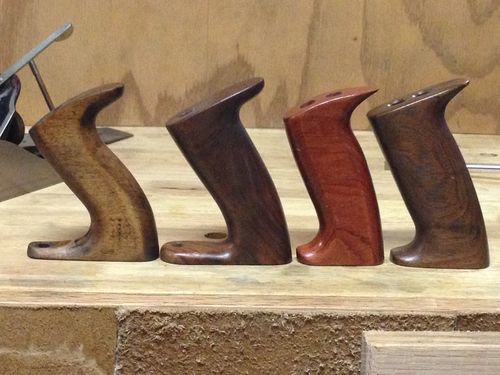
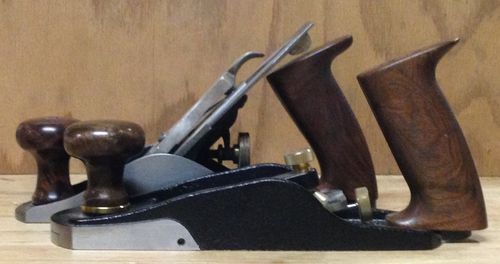
I have been fortunate enough to assemble and use an array of handplanes – Stanley Bailey bench, block, and specific use planes, oriental woodies of various sizes, Lee Valley Veritas bevel up and scraper planes, and some other assorted types. It took a while, as in 4-5 years of using, fettling, trying various methods of things and different plane designs to form up some conclusions from my experiences. I thought I would pass along these experiences, primarily with the lesser experienced in mind, to help them make better value decisions while getting started. You do not have to have premium planes or blades to get very good results. Pay a visit to Paul Sellers’ website and take in his 40+ years of hand plane use.
I use hand planes to flatten glued up panels (i.e. table tops, cabinet sides, shelves), joint boards, clean up machined surfaces, square up ends on a shooting board, and prep surfaces for finishing instead of sandpaper. I use power tools for the heavy work – table saw, planer, router, circular saw, etc. Hand planes produce a flat surface sanding cannot achieve, and my power tools can’t achieve the squareness of a shooting board. As such, I won’t be discussing jack or scrub planes – that’s too much manual labor for me and setting those planes up is easier. Blades don’t have to be as sharp and soles don’t have to be as flat. Put some camber on the blade if you want, a little or a lot, and go shave some wood.
The most significant aspects of getting a hand plane to perform, more or less in order:
(Stanley bench plane focused, but pertinent to bevel up, block, and most other hand planes)
Iron Sharpness
Sole Flatness
Chip Breaker Flatness/Bevel Angle
Frog Seating
Cap Iron Seating
Rust Prevention
I plan to do a blog entry for each.
Why a Sharp Iron?
More significant than a thicker iron or chip breaker is a sharp iron. Once I used a plane with a truly razor sharp iron, everything else became secondary. All of the hubbub about thicker replacement irons and chip breakers became marketing noise. The standard iron and chip breaker perform just as well as the Veritas replacements in my #7 for quite a while. Yes, the A2 Veritas iron holds its edge longer, and the thicker parts allow me to get results with a bit duller blade. But, I get excellent results in all my Stanley Bailey and block planes with standard irons and chip breakers.
I experienced the chattering, skipping, and difficulty in getting consistent “fluffy” shavings that many new users do, and then I figured out how to get truly sharp edges – an “aha!” moment.
How To Get It Sharp
The majority of this blog post relates to the honing part of sharpening, Because that’s where “sharp” is created. A small entry at the end discusses grinding primary bevels. This method is the same as advocated by Lie Nielsen, but uses different jigs and lapping film vs waterstones. The short jigs require the wheel to roll on the abrasive media and contaminate the next finer abrasives, and waterstones require flattening – that’s why I don’t use them.
There appears to be universal agreement as to what constitutes sharpness – from Ron Hock:
“A sharp edge only exists where two planes (i.e., the back and the bevel of a plane iron or chisel, or the two bevels of a knife) meet with zero radius. “
There does exist, however, significant discussion about how to get there. One of the main areas of discussion is free hand vs. jig use. I was never able to achieve a razor sharp edge (plane or knife) free hand. I’m sure part of that is learning the skill. However, referring to the accepted definition of a sharp edge, it is impossible to get as close to a zero radius free hand vs a jig. One may get close enough for their personal taste/use, and it will be quicker than using a jig. But, the free hand radius will not be as small, and will likely contain several edge lines along the length of the edge, and will therefore not hold a usable level of sharpness for as long. So, over a period of use, the extra time to use a jig is paid back through extended edge life.
Also, the smoother the edge is the longer it will last. The more serrated an edge is the quicker micro fractures of the steel occur and the edge wears down more quickly. Many support the use of stropping edges on leather with one of many compounds. While stropping will produce a sharp edge (I can shave hair and cut paper with it!), I am not aware of any of the compounds having grit as small as the 0.3um film I use. The larger the grit, the more of a serrated edge and the faster the edge wears down. Stropping is typically done freehand, and it is impossible to hold an angle as well as a jig. Wet sharpeners, such as Tormek, Grizzly, Sheppach, at least hold a constant angle, however the stone, even dressed to fine, leaves relatively large scratches, which result in sharp, serrated edges that break down faster. If you can find actual submicron compound, and use it on a fresh leather wheel of a wet sharpener, on a blade that has been honed down to 5um or less, then you might be in business.
Another issue with stropping – what happens to the metal particles that are worn away? The wire edge that may be broken off on the strop? There is no way to clean the metal particles off the strop. They embed in the leather (or mdf or other soft substrate) to continue to scratch up that edge and add serrations to it.
This is one area where I kind of disagree with Paul Sellers – leather stropping is a mainstay of his honing process. I think I understand Paul’s perspective – simple, economical methods that will work that most anyone can do. I think this method is about as economical and produces superior edges.
This method is a bit more involved, perhaps not as easy to fully understand, and will probably take a few minutes longer per edge sharpened vs Paul’s method. It takes me ~ 10 minutes/edge (not counting creating a primary bevel if needed). Choose any method you wish, as there are many that will produce a sharp edge, and last for a while at least. I chose this method because the proof of how and why it is the best method for the sharpest, longest lasting edges exists, and it is not that expensive (<$100 for everything). This method sounds more difficult than it is. It’s no different than any other jig or fixture you make for your shop.
But my edges look like a mirror! We are talking about very small scratches not visible with anything less than maybe 50x magnification, perhaps more. I encourage you to look at Brent Beach’s webpages (http://www3.telus.net/BrentBeach/) where you can see edges at 200x mag.
Method
For most of the following, I credit Brent Beach for getting me started on the path to an economical, sure fire method to get razor sharp edges repeatedly. I’ve made a few changes in the method, as well you may also, but the concept is the same. An example: Brent uses baby oil to lube and wash away particles. After trying many fluids, I have settled on water with some dish soap and a little water emulsion grinding coolant to prevent rust. Window cleaner works well also.
It’s the scary sharp method with a couple of important aspects:
1) Plastic backed abrasives vs paper backed,
2) Micro Bevels Front & Back.
The plastic backed “lapping film” lasts far longer than paper – probably 15 to 20x or more. My experience is that you may get a couple of blades sharpened before having to change the sheet of sandpaper – I can sharpen 15 to 20 or more edges before switching with lapping film. The grit is adhered to the film much more strongly for the film vs sandpaper. But – sandpaper is acceptable to try out this method. It is difficult to find sandpaper with fine enough grit for final polishing. P2500 has 8.4 um grit, 10x above what the final polishing needs to be accomplished with. Any abrasive – waterstones, oilstones, etc. can be used. A challenge with these is getting the jig at the same relative height of each different grit stone, since stones can wear at different rates, and the relative height is very important to create micro bevels. Cost of stones at the very fine end starts getting prohibitive as well. Any mix of abrasives can be used, it just gets difficult to ensure surfaces are at the correct level relative to one another.
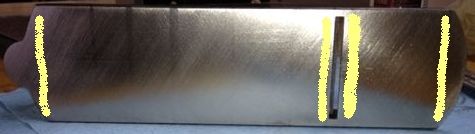
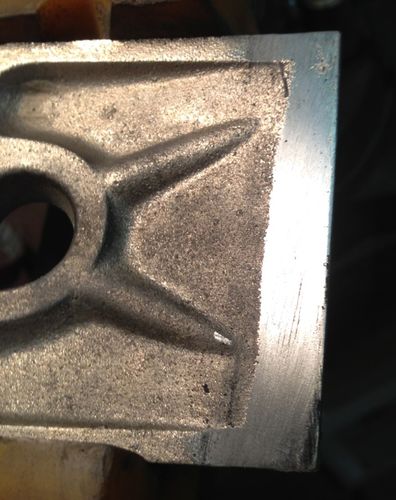
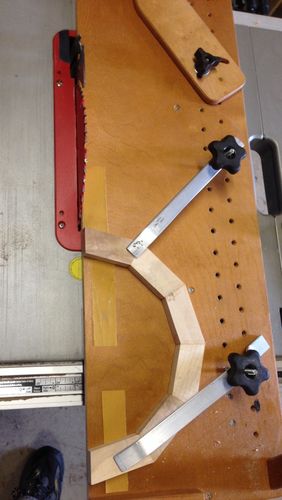
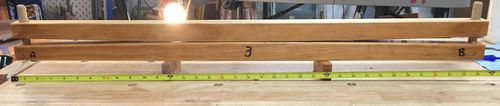
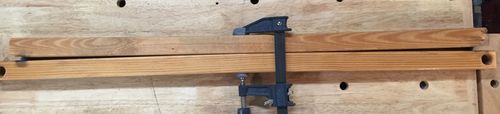
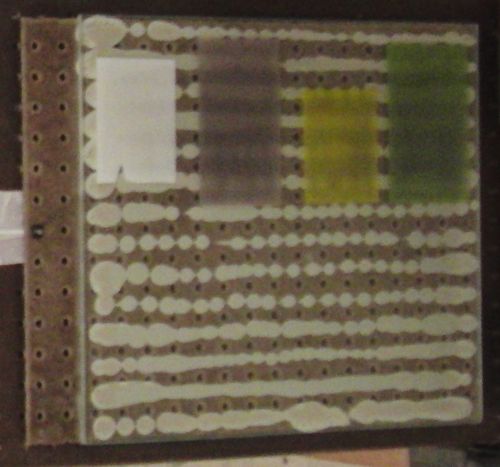
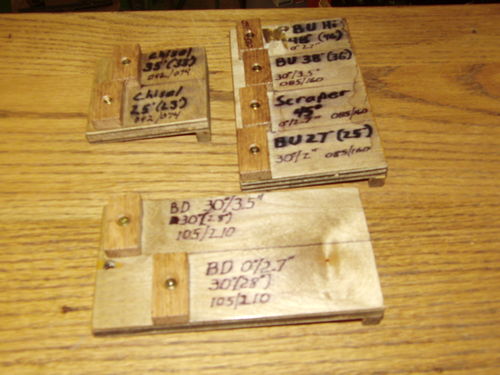
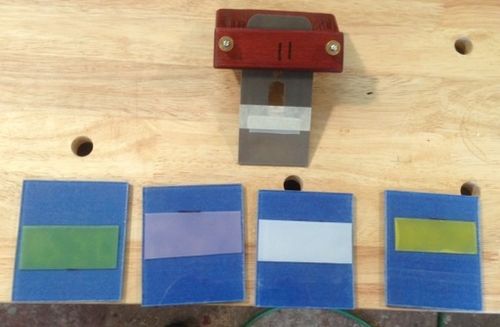
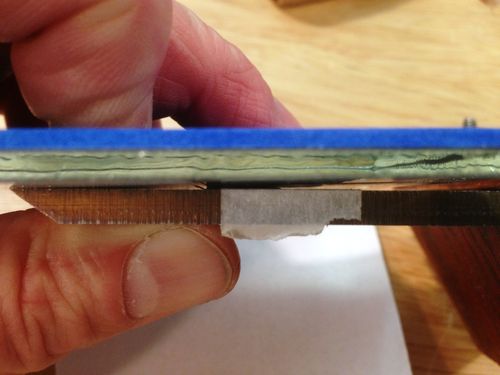
I currently use 3M brand lapping film coated with aluminum oxide – 266×30um, 12um, 3um, and 268×0.3 um. The lapping film is PSA backed, and mounted to ¼” thick glass from a local window store. Using a little soapy water, just like window tint film, makes installation (air bubbles) easier. The glass is glued to a piece of masonite, as can be seen in the picture below. I use simple shop made jigs of different lengths and angles (30°) depending on the blade:

Micro Bevels
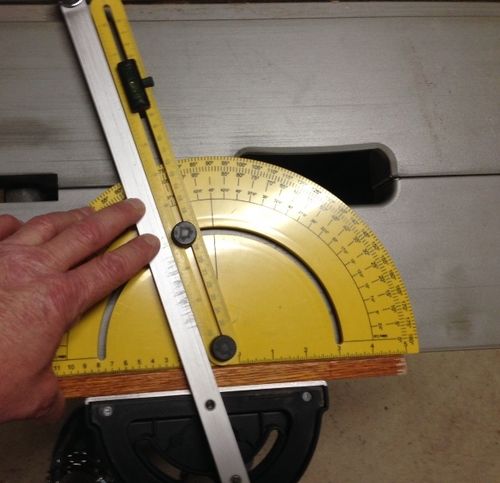
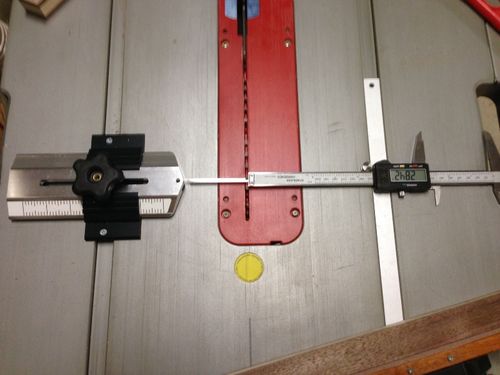
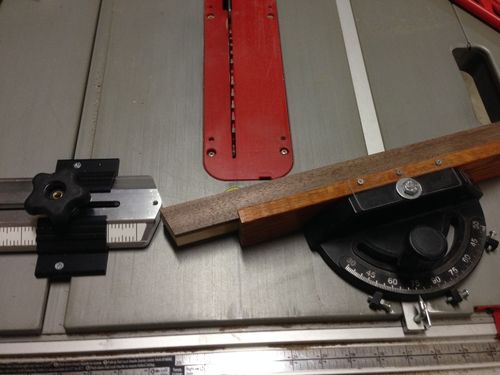
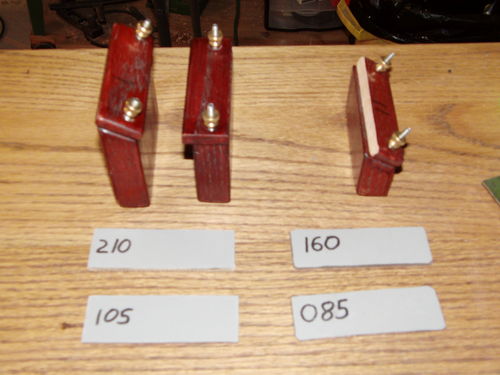
Micro bevels are simply very narrow bevels across the width of the blade. Their sole purpose is to reduce the amount of surface area which needs to be honed to a smoother finish, reducing the amount of steel removed, honing strokes, time required, and abrasive wear.. Both sides of the blade must be honed, the bevel side and the flat side. See Fig 1 – micro bevel sizes exaggerated. I typically have a primary bevel and 3 micro bevels on the bevel side made in 0.75° to 1° increments. A micro bevel is created with 25um, then a shim is added uner the jig and a micro bevel is made with 12um, then the shim is exchanged for a thicker one and another micro bevel is made with 3um. I then use the same shim and polish further with 0.3um. I use one micro bevel on the back side. This is conceptually the same as the “Charlesworth ruler trick”. Wooden (or any material) shims of varying thickness, topped with sandpaper to hold the bottom of the jig, are used to get the degree increments for the micro bevels. My shims for the 2.7” tall jig are 0.085” & 0.160”, and for the 3-1/2” tall jig are 0.105” and 0.210”. The geometry Law of Sines can be used to calculate shim thicknesses and blade projection for various desired angles. This gets a bit tedious with the math and I may make a separate entry for it. The blade projection can be repeated by using a board with blocks attached at the required distances, or a digital angle gauge can be used. the jigs use 8×32 hanging bolts – machine screw threads on one end, wood screw threads on the other end, and round brass “nuts” from Lowe’s.
Fig 1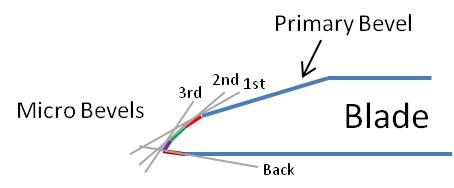
I typically create a primary bevel that is ~5° less than the finished bevel angle desired, for both bevel up or bevel down blades. I use a 25um DMT Duosharp to complete the primary bevel, and make a few passes on it first when resharpening to remove enough material to ensure I get any nicks out of the edge. Also, I use a piece of leather to break the wire edge formed by grinding, and an Arkansas stone flat on the back to initially smooth the edge. Generally at least part of the wire edge will bend over to the primary bevel side and will need to be removed. For the first couple of strokes on the first micro bevel, pull the blade toward you vs pushing. This will ensure any wire edge is broken off and not cut into the lapping film. Do the same on the back of the blade.
Back Bevel – I use small pieces of glass with lapping paper adhered. The shim is hi tech – a piece of plastic milk jug plastic about 0.016” thick attached to the back of the blade with masking tape. Each blade is marked with a line etched with a carbide awl at 1-1/2” from the edge. There is nothing magical about the shim thickness or distance. This arrangement gave me enough of an angle and was located far enough away from the jig holding the blade to be able to work the back bevel. I place the glass at the edge of a table, flip the blade/jig over so the top of the jig hangs off the table, and work the blade side to side and some front to back. I will use the 25um and 12um film some, but primarily the 3um and 0.3um do the polishing.


Blade Camber
I “bevel” the blade corners to prevent “plane tracks”. The bottom of the jigs is cut at an angle and the jig is held against the flat on each side to create the bevel (exaggerated in drawing) . Smoother blades get side bevels and a little pressure on the top of each side of the blade to create a very slight camber across the blade.


Primary Bevel Grinding
How the primary bevel is generated isn’t that important as long as the angle is correct, and the edge is square to the blade sides. A grit of ~60um, P220, is sufficient. Going finer requires a little less work in creating the 1st micro bevel. Belt sanders, bench grinders, wet sharpeners, water stones, sandpaper/lapping film all work. For manual work, an extra coarse/coarse diamond bench stone is my preference – they cut fast and don’t need flattening. Notice oil stones are not included. They just cut too slow for the major material removal required here. Wet sharpeners like Tormek, Grizzly, and Sheppac work (I currently use a 10” Grizzly), but only with O1 steel. A2, PM-V11, and HSS blades cut very slow and require frequent dressing with a diamond wheel dresser to keep the cutting rate up. If I were starting from scratch I’d probably go with an 8” bench grinder with friable wheels and a Tormek BGM-100 allowing use of Tormek accessories, or a belt sander with a good shop made jig. But, the Grizzly with Tormek accessories works great for my lathe tools so I’m sticking with it. Here is my review of the Tormek accessories.